
TL;DR:
- Setting up an Amazon storefront requires a Professional selling account, Brand Registry enrollment, and high-quality creative assets before access is granted. Sellers must optimize their store through SEO, engaging visuals, and strategic organization while regularly updating content to attract and retain shoppers. Continuous improvement and professional visuals are essential for maximizing conversions and enhancing brand presence on Amazon.
An Amazon Storefront is a customized, multi-page branded store hosted on Amazon that lets you showcase your products free of competitor ads and with full creative control. Learning how to set up an Amazon storefront is one of the highest-leverage moves an aspiring seller can make, because it transforms a generic product page into a destination shoppers return to. You will need three things before you can build one: a Professional selling account, enrollment in Amazon Brand Registry, and a registered or pending trademark. This guide walks you through every step, from prerequisites to launch, plus the optimization moves that separate top-performing stores from forgettable ones.
What do you need before setting up an Amazon storefront?
Three hard requirements stand between you and Store Builder access. Miss any one of them and your setup stalls before it starts.
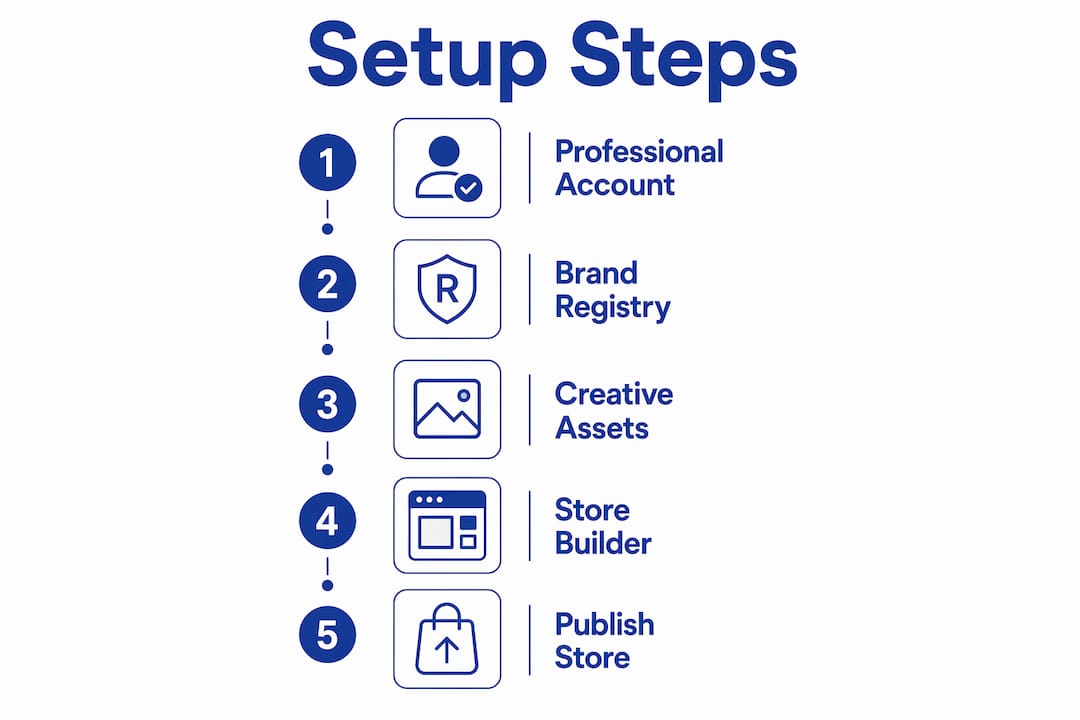
The Professional selling account is non-negotiable. Store Builder access is locked behind the Professional plan, which costs $39.99 per month. Many sellers assume their Individual account qualifies. It does not. The Individual plan excludes Store Builder entirely, so upgrading is the first concrete action you need to take.
Amazon Brand Registry is the second gate. Brand Registry enrollment is free, but it requires a valid trademark. That trademark must be text-based or image-based with words or numbers, and it must be filed with an accepted intellectual property office. The USPTO, EUIPO, UKIPO, and DPMA all qualify. A pending trademark is sufficient. You do not need full registration to proceed, which shortens the timeline considerably for new brands.
Creative assets are the third requirement, and sellers consistently underestimate this one. You need a brand logo at minimum, plus high-resolution product images and at least one lifestyle photo per product category. Text-heavy stores perform poorly. Shoppers respond to visuals, and Amazon’s moderation team will flag low-quality images during review.
Here is a quick reference for what you need ready before you open Store Builder:
| Requirement | Details |
|---|---|
| Professional selling account | $39.99/month; Individual plan does not qualify |
| Brand Registry enrollment | Free; requires pending or registered trademark |
| Trademark documentation | Text or image-based; accepted IP offices include USPTO, EUIPO, UKIPO |
| Brand logo | High resolution; used in store header and brand tiles |
| Product images | Professional quality; lifestyle images strongly recommended |
| Amazon Ads account | Needed for full campaign and analytics access post-launch |
Pro Tip: Apply for your trademark through the USPTO before you finalize your brand name. A pending application is enough to unlock Brand Registry, so you can start building your store while the trademark processes.
How to set up your Amazon storefront using Store Builder
Once your prerequisites are in place, the actual build happens inside Seller Central. The process is more intuitive than most sellers expect, but the sequence matters.
Log into Seller Central and navigate to the “Stores” tab in the top menu. Select “Manage Stores,” then click “Create Store.” You will be prompted to choose your brand from the list of Brand Registry-enrolled brands tied to your account.
Choose a template. Store Builder offers templates including a blank canvas, pre-built multi-page layouts, and category-specific arrangements. If you are new to this, the pre-built layouts save significant time. Pick the one closest to your product structure, then customize from there.
Build your pages using drag-and-drop tiles. Each page is assembled from modular widgets: product grids, text tiles, image tiles, video tiles, and call-to-action buttons. Your homepage should lead with your brand story and best-selling products. Sub-pages can organize by product category, collection, or use case. Store Builder lets sellers add shoppable product grids, embedded videos, and text tiles at no additional fee.
Add your products. Each product tile pulls from an existing ASIN in your catalog. The ASIN must be active and in stock. If a listing is suppressed or incomplete, it will not display correctly in the store. This is a common source of frustration during setup, so audit your listings before you start building.
Set your store metadata. Add a page title and meta description for each page. These fields directly affect how your store appears in Google search results. Keyword-rich descriptions here are not optional if you want external traffic.
Preview on desktop and mobile. Amazon recommends testing all links, product tiles, image quality, and navigation on multiple devices before submission. Mobile accounts for the majority of Amazon browsing, so a layout that looks clean on desktop but breaks on mobile will cost you conversions.
Submit for moderation. Once you are satisfied with the preview, click “Submit for Publishing.” Amazon’s moderation team reviews the store, typically within 24 to 72 hours. If assets do not meet guidelines, you will receive feedback and a chance to resubmit.
Schedule your launch. Store Builder lets you set a future publish date. If you are coordinating with a product launch, a Prime Day campaign, or a sponsored brand ad push, align your store go-live date with that event for maximum impact.
Pro Tip: Build your homepage last. Start with your sub-pages and product collections so you know exactly what content exists before you design the entry point shoppers see first.
How to optimize your Amazon storefront for better visibility and sales

A published store is not a finished store. The sellers who generate consistent traffic and conversions treat their storefronts as living assets, not set-and-forget pages.
SEO best practices for storefronts include adding relevant keywords in page titles, meta descriptions, and image alt text. Well-optimized storefront pages drive external organic traffic from Google directly to Amazon. That external traffic signal also feeds positively into Amazon’s A10 algorithm, which rewards pages that attract off-platform visitors. Pair this with your Amazon SEO strategy for compounding results.
Here are the optimization levers that move the needle most:
- Keyword-rich page titles and meta descriptions. Write these as if you are writing for Google, because you are. Include your brand name, primary product category, and one or two high-volume search terms.
- Strategic product grid organization. Group products by customer intent, not just by category. A “Best for Beginners” collection outperforms a generic “Products” grid because it matches how shoppers think.
- Lifestyle images and video. Engaging visuals like lifestyle images and videos drive engagement and sales far more than product-only photography. A 15-second brand video on your homepage communicates what a paragraph of text cannot.
- Clear calls-to-action. Every page should direct shoppers somewhere specific. “Shop the Collection,” “See What’s New,” and “Find Your Size” all outperform generic “Click Here” buttons because they match shopper intent.
- Mobile-first layout decisions. Test every tile, image, and button on a phone screen before you finalize. Navigation that requires pinching or horizontal scrolling loses mobile shoppers immediately.
“An Amazon Storefront effectively serves as a dedicated branded space that significantly increases conversion by removing competitor ads.” — Expert Insight on Storefront Benefits
The competitor-free environment is the storefront’s most underrated advantage. On a standard product detail page, Amazon surfaces competitor ads directly below your listing. Inside your storefront, those ads disappear. Sellers using storefronts avoid competitor product ads on their brand pages entirely, which keeps shopper attention on your catalog and measurably improves conversion rates.
Common challenges when launching your storefront
Most setup delays trace back to a small set of predictable problems. Knowing them in advance saves you days of back-and-forth with Amazon.
- Trademark delays blocking Brand Registry. If your trademark application is still processing, you can still apply for Brand Registry with a pending status. Do not wait for full registration. Apply as soon as you receive your application number from the USPTO or equivalent office.
- Individual plan access errors. Sellers who try to access Store Builder on an Individual account hit a hard wall. The fix is straightforward: upgrade to the Professional plan in Seller Central under “Account Info.” The change takes effect immediately.
- Moderation rejections from low-quality assets. The most common rejection reason is images that do not meet Amazon’s resolution or content standards. Use images that are at least 1500 x 1500 pixels. Avoid watermarks, promotional text overlaid on images, and any content that violates Amazon’s content policies.
- Inactive or suppressed ASINs. If a product tile links to a suppressed listing, the tile either shows an error or displays a broken product card. Run a full listing audit before you build. Fix suppressed listings first.
- Resubmission timing. Moderation review takes 24 to 72 hours, and corrections add another full cycle. If you are launching around a promotional event, submit your store at least five business days early to absorb one resubmission cycle without missing your window.
Pro Tip: Keep a folder of pre-approved brand assets, including logos at multiple sizes, lifestyle images, and a short brand video. Having these ready cuts your build time in half and reduces the chance of a moderation rejection.
Key takeaways
Setting up an Amazon storefront requires a Professional selling account, Brand Registry enrollment with a valid trademark, and high-quality creative assets before Store Builder access is granted.
| Point | Details |
|---|---|
| Professional account is mandatory | Individual plan sellers cannot access Store Builder; upgrade to Professional at $39.99/month first. |
| Brand Registry unlocks the store | Enroll with a pending or registered trademark from an accepted IP office like the USPTO or EUIPO. |
| Creative assets determine success | Lifestyle images and video outperform text-heavy stores; prepare assets before you build. |
| SEO extends your reach beyond Amazon | Keyword-rich page titles and meta descriptions drive Google traffic directly to your storefront. |
| Moderation takes 24 to 72 hours | Submit your store at least five business days before any planned launch or promotional event. |
What I have learned after watching hundreds of storefronts launch
Most sellers treat the storefront as a checkbox. They build it once, submit it, and move on. That is a missed opportunity, and I have seen it cost brands real money.
The storefronts that consistently outperform are the ones that get updated. Sellers who refresh their homepage banner ahead of Prime Day, add a new collection page for a seasonal product push, or swap in a fresh lifestyle video every quarter see measurably better engagement. Amazon rewards active stores with better placement in brand-related search results. A static store signals a disengaged seller.
The other thing I tell every seller: do not cut corners on creative assets to save money upfront. Investing in quality visuals is not a luxury. It is the single biggest factor separating a storefront that converts from one that just exists. A professional photographer for a one-day shoot costs far less than the revenue you lose from a store that looks amateur.
One practical shortcut that works: use Amazon’s pre-built templates and customize the color scheme and fonts to match your brand before you add a single product. This gives you a professional structure in under an hour, and you can refine the layout over time as you learn what your shoppers respond to. Pair your storefront work with a strong brand story on Amazon to give shoppers a reason to stay longer and buy more.
The sellers who win on Amazon in 2026 are not the ones with the most products. They are the ones with the most intentional brand presence.
— Goga
Take your storefront further with expert listing optimization
Your storefront is only as strong as the listings inside it. A beautifully designed store with weak product titles, thin bullet points, and missing backend keywords will still underperform, because shoppers who click through to a listing need to be converted there too.

Searchoneers specializes in exactly this. The Amazon listing enhancement guide covers everything from title structure and bullet point frameworks to backend keyword strategy and A+ Content. If you want to build a storefront that actually drives sales and not just traffic, pairing your store design with optimized listings is the move. You can also explore the listing optimization workflow to build a repeatable process that scales as your catalog grows.
FAQ
Who can create an Amazon storefront?
Only sellers enrolled in Amazon Brand Registry with an active Professional selling account can create an Amazon storefront. Individual plan sellers do not have access to Store Builder.
How long does Amazon storefront approval take?
Amazon’s moderation review typically takes 24 to 72 hours. If corrections are needed, each resubmission adds another full review cycle.
Is setting up an Amazon storefront free?
Yes, creating a storefront using Store Builder is free for Brand Registry-enrolled sellers. The cost is the Professional selling account subscription at $39.99 per month.
How do I drive traffic to my Amazon storefront?
Use keyword-optimized page titles and meta descriptions to capture Google search traffic, and run Sponsored Brand campaigns through Amazon Ads to drive internal Amazon traffic directly to your store pages.
Can I update my storefront after it goes live?
Yes. You can edit pages, swap images, add new product collections, and schedule future updates at any time through Seller Central. Regular updates improve engagement and keep your store relevant for seasonal campaigns.
Leave a Reply