

TL;DR:
- Selling on Amazon involves listing products to reach millions of buyers and choosing the right plan to match sales volume. Successful sellers verify their accounts, optimize listings with keywords and images, and select fulfillment methods based on their business needs. Ongoing management through advertising, pricing, and performance monitoring is essential to grow sales and maintain account health.
Selling on Amazon is defined as listing products on the world’s largest e-commerce marketplace to reach hundreds of millions of active buyers. Knowing how to start selling items on Amazon means choosing the right plan, registering your account, listing products correctly, and picking a fulfillment method that fits your goals. The process is more structured than most beginners expect, but every step is learnable. This guide walks you through the entire process, from your first account setup to your first sale, with the specific details that actually matter.
Which Amazon selling plan is right for you?
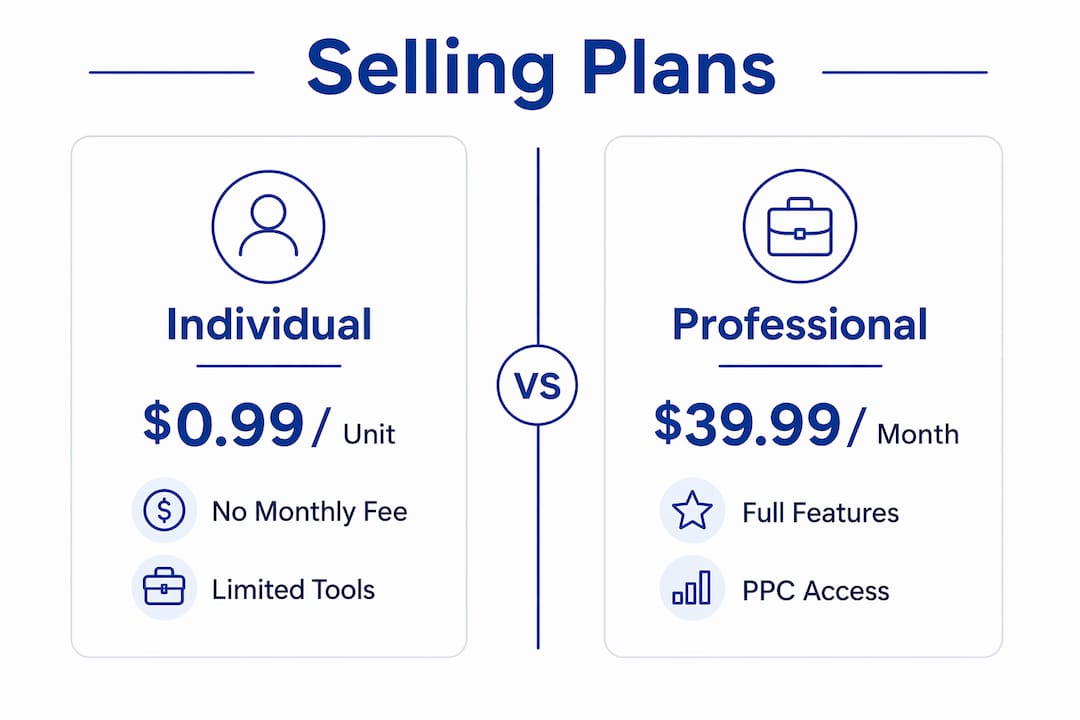
Amazon offers two primary selling plans, and picking the wrong one costs you money from day one. The Individual plan costs $0.99 per unit sold and suits sellers moving fewer than 40 units per month. The Professional plan runs $39.99 per month and unlocks advanced tools, bulk listing, advertising access, and eligibility for the Buy Box. If you plan to sell more than 40 items monthly, the Professional plan pays for itself immediately.
Plan comparison at a glance
| Feature | Individual Plan | Professional Plan |
|---|---|---|
| Monthly fee | $0 | $39.99/month |
| Per-unit fee | $0.99/sale | None |
| Amazon PPC ads | Not available | Available |
| Buy Box eligibility | Limited | Full access |
| Bulk listing tools | No | Yes |
| Best for | Testing the market | Scaling a business |
Before you register, gather these documents:
- Government-issued photo ID (passport or driver’s license)
- Business registration documents (if selling as a business entity)
- Tax identification number or Social Security Number
- Valid credit card for billing
- Bank account for deposit of sales proceeds
Account verification requires all five of these items. Missing even one delays your account approval by days or weeks.
Pro Tip: Choose the Professional plan from the start if you have a clear product idea. Switching plans later disrupts your advertising setup and Buy Box history.
How to register your Amazon seller account step by step
Registration on Seller Central takes roughly 30 minutes when you have all documents ready. Follow these steps in order:
- Go to sell.amazon.com and click “Sign up.”
- Create a new Amazon account or log in with an existing one.
- Enter your business name, address, and contact information.
- Submit your tax information using the tax interview form inside Seller Central.
- Add your credit card for monthly fees and your bank account for payouts.
- Upload your government-issued ID and any required business documents.
- Complete the identity verification video call if Amazon requests one.
- Set your store display name and configure your public seller profile.
After approval, configure your Seller Central dashboard before listing a single product. Set your shipping regions, return policies, and notification preferences. These settings affect how Amazon presents your offers to buyers.
Security matters more than most new sellers realize. Enable two-factor authentication on your Seller Central account immediately after registration. Account hijacking is a real threat, and two-factor authentication is the single most effective defense against it.
Pro Tip: Use a dedicated email address for your Amazon seller account. Mixing it with personal email makes it harder to catch urgent policy notices and account alerts.
How to list and optimize your products on Amazon
Listing a product on Amazon means either matching an existing listing or creating a brand new one. If your product already exists in Amazon’s catalog, you simply match your offer to the existing product detail page using the ASIN (Amazon Standard Identification Number). If your product is new to the catalog, you create a fresh listing and supply all the content yourself.

Every new listing requires a product identifier. For most physical goods, this means a UPC, EAN, or ISBN barcode. You also need at least one product image that meets Amazon’s white background requirement, though six to eight high-quality images convert significantly better.
Strong listings share four qualities. Keyword-rich titles, compelling bullet points, high-quality images, and A+ Content for Brand Registered sellers are the core elements that drive both visibility and conversions. A+ Content lets you add comparison charts, lifestyle images, and brand story modules to your product page. Sellers with Brand Registry access should use it on every listing.
Common listing mistakes to avoid:
- Titles stuffed with irrelevant keywords that confuse buyers
- Bullet points that list features without explaining benefits
- Images under 1,000 pixels on the longest side (this disables zoom)
- Missing backend search terms, which are invisible to shoppers but read by Amazon’s A10 algorithm
- Incorrect product category selection, which buries your listing in the wrong search results
Amazon’s AI listing tools can generate draft titles, bullet points, and descriptions from a product URL or image. This saves time, but always review and edit the output. AI drafts often miss the specific keywords your category requires. Use the draft as a starting point, not a finished product.
Pro Tip: Study the top three organic results in your category before writing your title. The patterns in those titles reveal exactly what keywords Amazon’s algorithm rewards in your niche.
For a deeper look at what separates average listings from high-converting ones, the Amazon listing optimization guide from Searchoneers covers every element with real examples.
How to choose the right fulfillment method for your business
Fulfillment by Amazon (FBA) and Fulfilled by Merchant (FBM) are the two main options, and the choice shapes your entire operation. With FBA, you ship inventory to Amazon’s warehouses and Amazon handles picking, packing, shipping, and customer service. With FBM, you store and ship products yourself.
FBA products earn Prime eligibility, which gives them a significant visibility and conversion advantage over non-Prime listings. Prime buyers filter by Prime delivery by default, which means FBM listings often go unseen by a large portion of Amazon’s highest-spending customers.
Key considerations for each method:
- FBA: Higher fees per unit, but Amazon handles returns, customer service, and fast shipping. Best for high-volume, standardized products.
- FBM: Lower fees, but you manage warehousing, packing, and shipping yourself. Best for oversized, fragile, or custom products where Amazon’s warehouse handling creates damage risk.
- FBA storage fees: Amazon charges monthly storage fees that increase significantly in the fourth quarter (october through december). Avoid sending excess inventory before you know your sell-through rate.
Inventory forecasting and restock alerts prevent two costly problems: stockouts that kill your ranking and excess inventory that racks up storage fees. Use Seller Central’s inventory health report weekly once your products go live.
Pro Tip: Start FBA with a small test shipment of 20–50 units before committing to large inventory orders. This lets you validate demand without tying up capital in slow-moving stock.
What ongoing steps grow your Amazon sales after launch?
Launching a listing is the beginning, not the finish line. Consistent growth requires active management across advertising, pricing, and performance monitoring.
- Amazon PPC (Pay-Per-Click): Sponsored ads and automated pricing tools are the two fastest ways to drive traffic to a new listing. Start with automatic campaigns to discover which keywords convert, then shift budget to manual campaigns targeting your best performers.
- Pricing strategy: Monitor competitor prices daily. Amazon’s automated pricing tool adjusts your price within a range you set, keeping you competitive without constant manual updates.
- Performance monitoring: Check your Account Health dashboard weekly. Amazon tracks your Order Defect Rate, Late Shipment Rate, and Policy Violations. Falling below Amazon’s thresholds triggers account warnings or suspensions.
- Compliance: Amazon requires full compliance with national, state, and local product safety and legal regulations. Restricted product violations are one of the most common causes of listing removal. Research your product category’s restrictions before you list.
- External traffic: Drive traffic from social media, email lists, or content marketing to your Amazon listings. External traffic signals boost your organic ranking because Amazon’s A10 algorithm rewards products that attract buyers from outside the platform.
Track your sales data inside Seller Central’s Business Reports tab. Pay attention to your click-through rate (CTR) and conversion rate (CVR) by ASIN. A high CTR with low CVR means your images attract clicks but your listing fails to close the sale. A low CTR means your title or main image needs work.
Key Takeaways
Selling successfully on Amazon requires the right plan, a verified account, optimized listings, and consistent post-launch management to grow revenue over time.
| Point | Details |
|---|---|
| Choose your plan carefully | The Professional plan at $39.99/month pays off once you exceed 40 monthly sales. |
| Prepare documents before registering | Have your ID, tax info, credit card, and bank account ready to avoid delays. |
| Optimize every listing element | Keyword-rich titles, quality images, and A+ Content directly increase conversions. |
| Pick FBA for Prime eligibility | FBA products reach Prime buyers who filter out non-Prime listings by default. |
| Monitor performance weekly | Track CTR, CVR, and Account Health to catch problems before they cost you sales. |
What I’ve learned from watching sellers get this wrong
Most new sellers obsess over finding the “perfect product” and underinvest in the listing itself. I’ve seen sellers with genuinely great products rank on page four because their titles read like a parts list and their images looked like phone snapshots. The product was not the problem. The presentation was.
The second mistake I see constantly is skipping the Professional plan to save $39.99 a month. Without PPC access, you are invisible in a competitive category. Organic ranking takes months. Advertising compresses that timeline to days. Saving $40 while losing weeks of sales momentum is a bad trade.
Product research matters, but brand building matters more over time. Sellers who register their brand through Amazon Brand Registry gain access to A+ Content, Sponsored Brand ads, and the Brand Analytics dashboard. These tools compound. A seller with a registered brand and optimized listings consistently outperforms a seller with better products but no brand presence.
My honest advice: treat your first 90 days as a learning phase, not a profit phase. Set a realistic budget, test small, and use every data point Seller Central gives you. The sellers who scale are the ones who read their numbers and adjust fast.
— Goga
Your Amazon listings deserve more than a first draft
Getting your account open is step one. Getting your listings to actually convert is where the real work begins.

Searchoneers specializes in Amazon listing optimization, from keyword-rich titles and bullet points to backend search terms that the A10 algorithm rewards. Whether you are launching your first product or fixing listings that are not converting, the listing enhancement guide gives you a clear, proven framework. For sellers who want a structured process, the listing optimization workflow walks through every element in order. Your listing is your storefront. Make it count.
FAQ
What does it cost to start selling on Amazon?
The Individual plan charges $0.99 per unit sold, while the Professional plan costs $39.99 per month. Additional fees include referral fees (typically 8%–15% of the sale price) and FBA fees if you use Amazon’s fulfillment service.
How long does Amazon seller account approval take?
Most accounts receive approval within 24–48 hours, but identity verification can extend the process to several days if Amazon requests additional documentation.
Do I need a business license to sell on Amazon?
Amazon does not require a business license to open a seller account, but your local or state laws may require one depending on your product type and business structure.
How much can I earn selling on Amazon?
Amazon sellers earn between $1,000 and $25,000 per month depending on product selection, pricing, and effort. Earnings vary widely, and most sellers take several months to reach consistent profitability.
What is FBA and should beginners use it?
FBA (Fulfillment by Amazon) means Amazon stores, packs, and ships your products. Beginners benefit from FBA because it grants Prime eligibility and removes the logistics burden, though it does add per-unit fees.

Comments
3 responses to “How to Start Selling Items on Amazon in 2026”
[…] How to Start Selling Items on Amazon in 2026 – Searchoneers […]
[…] How to Start Selling Items on Amazon in 2026 – Searchoneers […]
[…] How to Start Selling Items on Amazon in 2026 – Searchoneers […]