
Amazon sellers who struggle to get their listings noticed are not alone. The marketplace is more competitive than ever, and simply uploading a product page is not enough to drive consistent sales. Optimized listings can receive up to 3 to 5 times more impressions and significantly boost conversion rates. This guide walks you through a complete, data-driven workflow built on current best practices, so you can stop guessing and start seeing real results in both visibility and revenue.
Table of Contents
- Why a structured workflow guarantees listing optimization success
- Essential tools and data for effective listing optimization
- Step-by-step listing optimization workflow
- Common pitfalls and troubleshooting in listing optimization
- How to evaluate results and scale your listing optimization success
- Take your Amazon listing optimization to the next level
- Frequently asked questions
Key Takeaways
| Point | Details |
|---|---|
| Structured workflow is essential | Following a proven listing optimization process increases your chance of ranking and sales growth. |
| Benchmark your success | Target a 10-20% conversion rate and use competitor metrics as guides for your listing improvements. |
| A+ Content drives results | Adding A+ Content can boost your conversion rate by around 5-6%. |
| Data-driven updates scale performance | Measure every change and iterate for ongoing optimization and higher sales. |
| Reviews are critical for ranking | Aim for at least 50 reviews to unlock better rankings and trust with buyers. |
Why a structured workflow guarantees listing optimization success
Understanding why listing optimization matters is the first step, but knowing how to execute it systematically is what separates top sellers from the rest. Amazon’s A10 algorithm is not a simple ranking formula. It weighs multiple performance signals simultaneously, and missing even one can cost you significant visibility.
The A10 algorithm prioritizes performance factors including sales velocity, conversion rate, click-through rate, seller authority, and external traffic. Top sellers consistently hit conversion rates between 10 and 20 percent. If your listing is not hitting those numbers, a structured workflow is the fastest way to close the gap.
Here are the core ranking drivers you need to address in every optimization cycle:
- Sales velocity: How fast your product sells relative to competitors
- Conversion rate: The percentage of visitors who actually buy
- Click-through rate (CTR): How often shoppers click your listing from search results
- Seller authority: Your account health, feedback score, and fulfillment performance
- External traffic: Visits driven from outside Amazon, such as social media or email
A structured workflow ensures you never skip a ranking factor. Sellers who follow a repeatable process consistently outperform those who optimize reactively.
| Ranking factor | Impact level | Optimization lever |
|---|---|---|
| Sales velocity | Very high | Pricing, promotions, PPC |
| Conversion rate | Very high | Content, images, reviews |
| Click-through rate | High | Title, main image, price |
| Seller authority | Medium | Account health, feedback |
| External traffic | Medium | Social, email, influencers |
Essential tools and data for effective listing optimization
With your workflow foundation set, you need the right data and resources to execute effectively. Jumping into optimization without proper tools is like trying to navigate without a map. You might move, but you will not get where you want to go efficiently.

Listings with A+ content see conversion rates rise by an average of 5.6 percent. That single upgrade alone can meaningfully shift your revenue, which is why having the right tools to build and test that content matters.
| Tool category | Recommended tools | Primary use |
|---|---|---|
| Keyword research | Helium 10, Jungle Scout | Find high-volume, relevant keywords |
| Analytics | Seller Central, DataHawk | Track impressions, CTR, sales |
| A/B testing | Manage Your Experiments | Test titles, images, A+ content |
| Review management | FeedbackWhiz, Jungle Scout | Monitor and request reviews |
| Competitor analysis | Helium 10 Cerebro | Reverse-engineer top listings |
Before you start optimizing, pull these key metrics for your current listing:
- Impressions: How many times your listing appeared in search
- CTR: The ratio of clicks to impressions
- Conversion rate: Orders divided by sessions
- Review count and rating: Current social proof baseline
- Sales velocity: Units sold per day or week
You can find additional inventory listing optimization tips to help you build a complete data baseline before touching a single word of your listing.
Pro Tip: Pull your top three competitors’ ASINs and run them through a reverse keyword tool. You will quickly see which high-volume keywords they rank for that you are missing entirely.
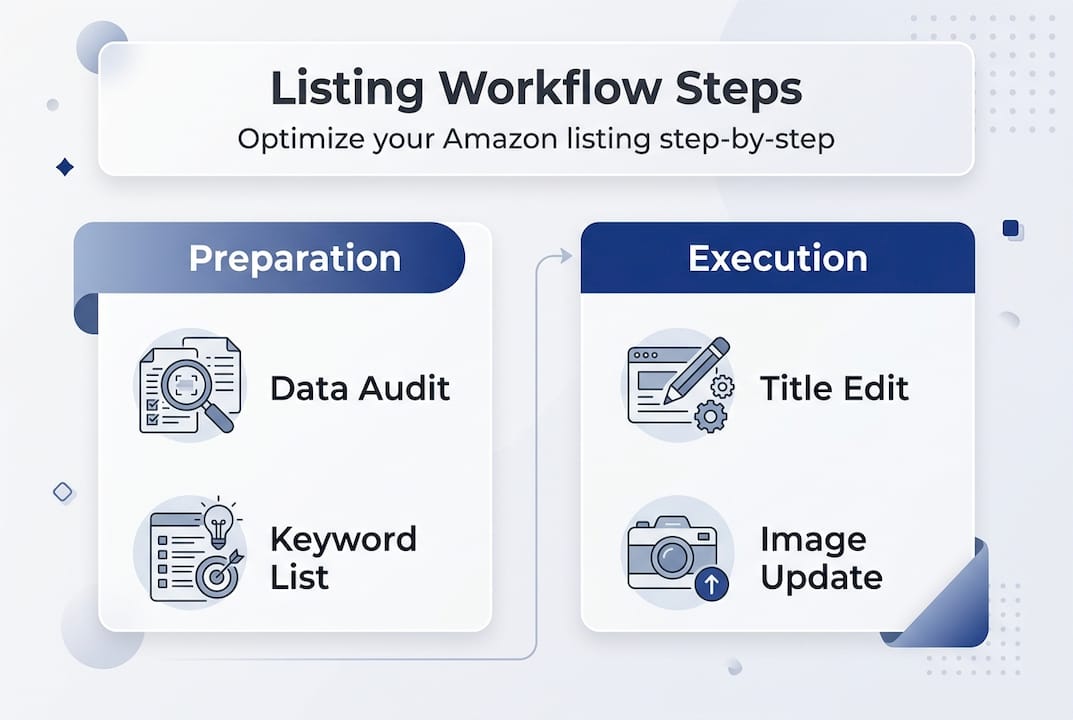
Step-by-step listing optimization workflow
You are equipped with the tools. Now it is time to execute each workflow step for real results. This is the core of the process, and every step builds on the last.
Case studies following this workflow for Amazon sellers have seen conversion rates jump from 8.4 percent to 21.3 percent, with sales increases of 240%. That is not a fluke. It is what happens when every element of a listing works together.
Follow these complete listing optimization steps in order:
- Data audit: Pull your current impressions, CTR, conversion rate, and sales velocity. Document everything before you change anything.
- Keyword research: Use Helium 10 or Jungle Scout to identify primary, secondary, and long-tail keywords. Prioritize by search volume and relevance.
- Title overhaul: Lead with your primary keyword, include key attributes like size, color, and quantity, and stay within Amazon’s character limits.
- Bullet points: Each bullet should address a specific customer benefit or pain point. Use secondary keywords naturally, not forcefully.
- Backend keywords: Fill all available backend search term fields with relevant keywords not already used in your visible content.
- Description and A+ content: Use storytelling and visuals to reinforce your value proposition. A+ content replaces the standard description for brand-registered sellers.
- Image enhancement: Lead with a clean white-background hero image, then use lifestyle and infographic images to show features and scale.
- Review strategy: Use Amazon’s Request a Review button consistently. Aim for more than 50 reviews to unlock meaningful ranking impact.
- Price optimization: Check competitor pricing weekly and adjust to stay competitive without sacrificing margin.
| Metric | Before optimization | After optimization |
|---|---|---|
| Conversion rate | 8.4% | 21.3% |
| Impressions | Baseline | 3 to 5x increase |
| Sales volume | Baseline | Up to 240% increase |
| Review count | Under 20 | Target 50+ |
You can explore additional product listing strategies to layer on top of this core workflow once you have the fundamentals locked in.
Pro Tip: Never stuff keywords into your title or bullets just to hit a count. Amazon’s algorithm and real shoppers both penalize unnatural language. Write for the buyer first, then refine for search.
Common pitfalls and troubleshooting in listing optimization
Even the best workflows hit snags. Knowing what to avoid keeps you ahead of the competition and saves you from wasting weeks on changes that do not move the needle.
One of the most overlooked issues is incomplete indexing. Indexing relies on TFSD: Title, Features, Backend, and Description. If your keyword is missing from all four of those fields, Amazon may not index your listing for that term at all.
Use the Amazon listing optimization checklist to verify every field is complete before you consider a listing fully optimized.
Sellers who skip backend keywords are leaving free indexing opportunities on the table. It takes five minutes to fill those fields and can unlock dozens of additional search placements.
Here are the most common mistakes and how to fix them fast:
- Skipping backend keywords: Fill every available character in Seller Central’s backend search terms field
- Poor main image: Use a professional photo with a pure white background and no text overlays
- Neglecting reviews: Set a weekly reminder to use the Request a Review button for recent orders
- Misreading data: Compare sessions to orders, not just page views, for an accurate conversion rate
- Ignoring competitor changes: Check your top competitors monthly and adjust your content accordingly
If you want a deeper breakdown of how to rank higher on Amazon, start by auditing your TFSD fields and confirming your top keywords are indexed.
How to evaluate results and scale your listing optimization success
Optimizing a listing is just the start. Tracking and iterating is how you sustain and scale growth over time. Without a measurement loop, you are flying blind after the initial lift.
Optimized listings get 3 to 5 times more impressions and can see up to 10 times more sales when the full workflow is applied correctly. But those numbers only hold if you keep monitoring and adjusting.
Follow these steps to evaluate and scale your results:
- Set a baseline: Document your pre-optimization metrics including impressions, CTR, conversion rate, and daily sales.
- Wait for data: Give changes at least two to four weeks before drawing conclusions. Amazon’s algorithm needs time to re-index and re-rank.
- Compare KPIs: Run a before-and-after analysis on every metric you tracked at baseline.
- Identify winners: If a new title or image drove a CTR increase, that is a winner. Scale that approach to other listings.
- Test one variable at a time: Use Amazon’s Manage Your Experiments tool to run controlled A/B tests on titles and A+ content.
- Repeat the cycle: Optimization is not a one-time event. Schedule a full listing review every 60 to 90 days.
Building high-converting Amazon listings requires this kind of disciplined iteration. The sellers who win long-term are the ones who treat optimization as an ongoing system, not a one-time project.
Take your Amazon listing optimization to the next level
You now have a proven, step-by-step framework for transforming underperforming listings into high-visibility, high-converting assets. The workflow works, but execution is everything.

At Searchoneers, we have built a library of resources specifically for Amazon sellers who want to move faster and smarter. Start with the Amazon listing enhancement guide to get a detailed breakdown of every content element that drives conversions. Then walk through the full optimization workflow to make sure your process is airtight. And before you publish any changes, run through the Amazon listing optimization checklist to confirm nothing is missing. These resources are built to save you time and help you avoid the costly mistakes that slow most sellers down.
Frequently asked questions
What is the ideal Amazon conversion rate to target for optimized listings?
A 10 to 20 percent conversion rate is the current benchmark for well-optimized Amazon listings, according to A10 algorithm data. If you are below that range, your content, images, or pricing likely need attention.
How do I know if my listing is fully indexed by Amazon?
Your listing is indexed when your target keywords appear across the TFSD fields: Title, Features, Backend, and Description, and the product shows up in search results for those terms. You can verify indexing by searching your keyword on Amazon and checking if your ASIN appears.
Does adding A+ content really improve performance?
Yes. Listings with A+ content see conversion rates rise by 5.6 percent on average. For brand-registered sellers, it is one of the highest-return upgrades available.
How important are reviews for ranking and sales?
Listings with over 50 reviews tend to rank higher and convert more buyers. Reviews signal trust to both the algorithm and shoppers, making them a critical part of any long-term optimization strategy.