

TL;DR:
- Conversion rate optimization improves sales by systematically refining listing elements based on data.
- Sellers should track baseline metrics and test one change at a time for effective results.
- Ongoing measurement and regular audits are key to sustained Amazon listing performance.
Getting traffic to your Amazon listing is only half the battle. The real problem shows up when sessions climb but your sales stay flat, meaning browsers are landing on your page and leaving without buying. That gap between traffic and revenue is exactly what conversion rate optimization (CRO) is designed to close. This guide gives you a structured, prioritized checklist built around what actually moves the needle, from main image selection to review strategy, backed by proven practices so you can stop guessing and start converting more visitors into paying customers.
Table of Contents
- Essential tools and prerequisites for Amazon conversion optimization
- Step-by-step conversion rate checklist for Amazon listings
- Common conversion killers (and how to fix them)
- Measuring success: Track, compare, and adjust
- A smarter approach: Why most checklists fail (and how to win)
- Ready to boost your conversions with expert support?
- Frequently asked questions
Key Takeaways
| Point | Details |
|---|---|
| Checklist mindset | Approach optimization as a structured, staged process you repeat regularly. |
| Prioritize and track | Make changes one at a time and measure impact using Amazon’s built-in analytics. |
| Fix what matters | Address common pitfalls like poor images, unclear titles, and unmanaged reviews first. |
| Iterate for success | Constant refinement beats a one-off checklist—keep testing and improving for ongoing gains. |
Essential tools and prerequisites for Amazon conversion optimization
Before touching a single listing element, you need a solid foundation. Jumping straight into edits without tracking baselines is like rearranging furniture in the dark. You will not know if things improved or got worse.
Start by clearly defining your target audience. Who is searching for your product? What problem do they need solved? Knowing your buyer persona shapes every decision, from image style to the language in your bullet points. A product aimed at fitness beginners reads very differently from one aimed at competitive athletes.
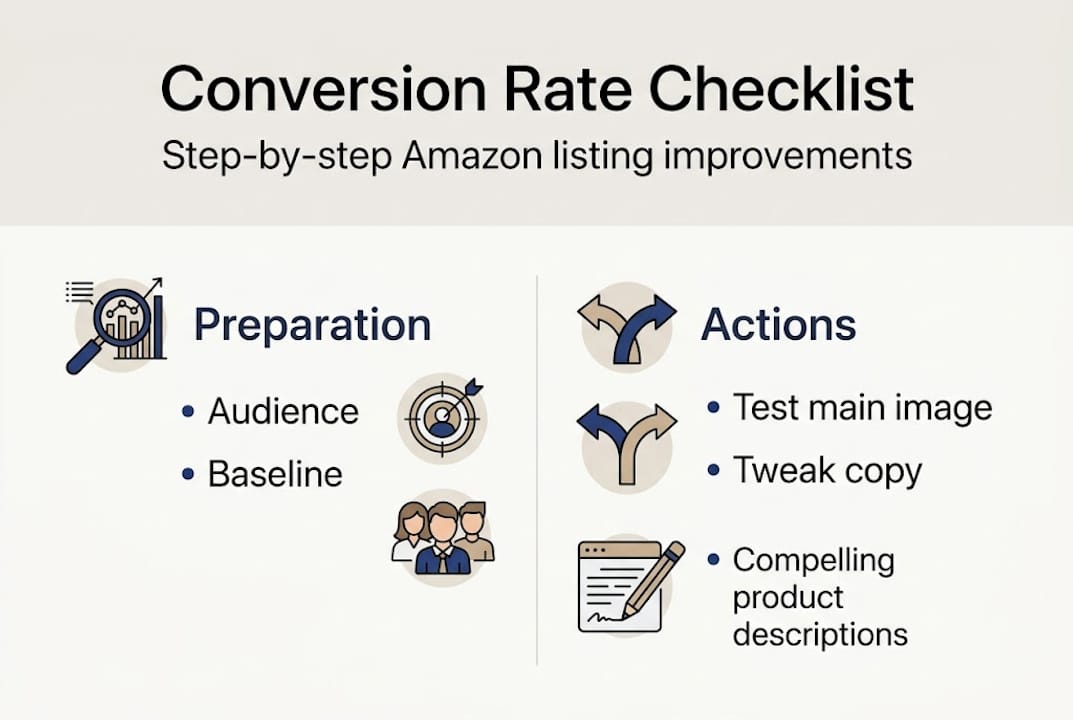
Next, gather your current baseline data from Amazon Seller Central. Record your session numbers, unit session percentage (your conversion rate), and total order volume for at least the last 30 days. This is your starting point. Without it, you cannot measure the impact of any change you make. As Amazon CRO guidance confirms, Amazon CRO requires ongoing, measured testing rather than one-off edits.
For split testing, tools like Manage Your Experiments (Amazon’s native A/B testing feature available to brand-registered sellers) let you test two versions of a title or image simultaneously. Third-party tools such as Pickfu allow you to get consumer feedback on images or copy before publishing.
Here is a quick overview of what to have ready:
- Seller Central access with Brand Registry (for A+ Content and split testing)
- 30-day baseline data: sessions, conversion rate, revenue
- A testing log: a simple spreadsheet tracking what you changed, when, and results
- Competitor research: review at least 3 to 5 top-ranking competing listings
- Keyword data: use tools like Helium 10 or Data Dive for search volume insights
| Tool | Purpose | Cost tier |
|---|---|---|
| Seller Central | Baseline metrics and Manage Your Experiments | Free |
| Helium 10 | Keyword research and listing analytics | Paid |
| Pickfu | Consumer polling for image/copy decisions | Pay-per-poll |
| Google Sheets | Testing log and data tracking | Free |
Pro Tip: Before starting any optimization, save a screenshot of your current listing exactly as it looks. Pair it with a data export from Seller Central. This becomes your reference point for every future comparison.
For a full pre-optimization audit process, review this Amazon listing checklist and the accompanying listing optimization checklist to make sure nothing gets missed.
Step-by-step conversion rate checklist for Amazon listings
With your tools and baseline data in hand, here is a prioritized, actionable sequence for working through your listing. Follow the order, because each element builds on the one before it.
- Main image: This is your single most powerful conversion lever. It appears in search results before a shopper even clicks. Use a clean white background, fill 85% or more of the frame, and show the product clearly. No text overlays. No props that distract.
- Title: Lead with your primary keyword, then add the clearest benefit statement you can fit within Amazon’s character limit. Avoid keyword stuffing. Read it aloud. If it sounds robotic, rewrite it.
- Bullet points: Each bullet should address one specific customer benefit or pain point. Lead with a bold capitalized label (e.g., EASY TO CLEAN), then back it up with one supporting sentence. Keep bullets scannable.
- Product description or A+ Content: Sellers with Brand Registry should build A+ Content with comparison charts, lifestyle images, and brand story modules. Non-registered sellers should write a clean, benefit-focused description using basic HTML formatting.
- Secondary images and video: Aim for all seven image slots. Use these to show dimensions, lifestyle shots, instructions, and close-up details. A product video can significantly increase time on page, which correlates with higher conversion.
- Reviews and ratings: You cannot fake this, but you can proactively request reviews using Amazon’s “Request a Review” button. Address recurring negative feedback by updating the product or listing to set accurate expectations.
- Price and offer visibility: Check your Buy Box ownership rate. Make sure pricing is competitive within your category. If you use coupons or promotions, these appear in search results and directly boost click-through rates.
Incremental edits and isolated tests help pinpoint what actually boosts conversions, which is why this numbered order matters.
| Step | Expected impact | How to measure |
|---|---|---|
| Main image update | High (affects CTR and sessions) | Compare session count week over week |
| Title revision | High (affects rank and relevance) | Track keyword ranking and conversion rate |
| Bullet point rewrite | Medium (improves clarity) | Monitor unit session percentage |
| A+ Content addition | Medium to high | Compare conversion rate before and after |
| Secondary images/video | Medium | Review time on page and return rate |
Pro Tip: If you only have time for one change this week, update your main image. It influences both your click-through rate from search and your first impression on the listing page, making it the fastest potential win.
For deeper guidance on building high-converting listings, see this high-converting listing guide, along with these practical image optimization tips and advice on how to optimize inventory listings for sustained sales growth.
Common conversion killers (and how to fix them)
Even well-intentioned listings have blind spots. These are the most frequent issues that quietly destroy conversion rates, often without sellers realizing it.
- Images with text overlays or cluttered backgrounds: Amazon shoppers scan fast. Busy images lose them. Fix: use only clean, compliant product photos in your first slot.
- Keyword stuffing in titles or bullets: Cramming keywords into every line makes copy unreadable and signals low quality to shoppers. Fix: write for the human first, then verify keyword inclusion naturally.
- Mismatched expectations: If your images show a product looking larger than it is, returns and negative reviews follow. Fix: include a size reference in at least one image and specify dimensions clearly in bullets.
- Weak main value proposition: If your listing doesn’t answer “why this product over others” in the first two seconds, you lose the shopper. Fix: lead your title and first bullet with your single clearest differentiator.
- Poor star rating or unaddressed negative reviews: Ratings below 4.0 dramatically reduce conversion. Fix: proactively use the “Request a Review” feature, and update listings that consistently generate specific complaints.
- Generic or missing A+ Content: Plain text descriptions underperform. Fix: build A+ modules with comparison tables, icons, and lifestyle imagery to tell a compelling product story.
“Iterative testing on individual listing elements reveals hidden conversion obstacles” and prevents sellers from wasting time on changes that don’t matter.
The key discipline here is to fix one thing at a time. Changing your images, title, and price simultaneously means you won’t know what drove any improvement or decline. Use a simple measure, change, measure loop: record your current conversion rate, make one edit, wait at least 7 to 14 days, then measure again.

For real-world reference points, browse these optimized listing examples to see what a polished listing looks like in practice, and use this Amazon SEO checklist to ensure backend keywords and indexing are not holding you back.
Measuring success: Track, compare, and adjust
Optimization without measurement is just decoration. After implementing changes, you need a repeatable system for reviewing results and deciding your next move.
Your primary KPIs (key performance indicators) are:
- Sessions: the number of unique visits to your listing
- Unit session percentage: Amazon’s term for your conversion rate (orders divided by sessions)
- Total orders and revenue: the bottom-line outcome of all your efforts
- Return rate: a spike here signals a listing accuracy problem
Here is a simple weekly and monthly review process:
- Pull your Business Report from Seller Central every Monday morning for the prior week.
- Log sessions, unit session percentage, and orders into your tracking spreadsheet.
- Compare against the same period before your most recent change.
- If the metric improved by a meaningful margin, consider the change successful and move to the next item.
- If it dropped or stayed flat, revert or refine the change and retest.
- Every month, review your top 5 listings and assess whether seasonal shifts, price changes, or new competition require a new round of optimization.
As a best practice, always track sessions, order percentage, and changes before and after specific tests to maintain clean data.
One important caution: avoid drawing conclusions from fewer than 100 to 200 sessions post-change. Small sample sizes produce misleading results. Patience and statistical confidence matter more than speed here.
For a structured audit approach, revisit these conversion audit steps and set up a repeatable workflow for consistent results that keeps your entire catalog improving over time.
A smarter approach: Why most checklists fail (and how to win)
Here’s the uncomfortable truth: most sellers apply a checklist once, see a small bump in sales, and then move on. That’s exactly why most sellers plateau. A checklist is a starting point, not a finish line.
The sellers who consistently outperform their categories treat CRO as a habit, not a project. They test one variable per cycle, document results religiously, and revisit their top listings every 6 to 8 weeks because the marketplace is not static. Competitor listings improve. Customer expectations shift. Seasonal demand changes what resonates. A listing that converted well last quarter may underperform today.
Continuous measurement and refinement far outperform single-edition checklist use, and the data consistently backs this up.
We’ve seen sellers invest hours into a single perfect listing, never touch it again, and wonder why conversions drift downward six months later. Meanwhile, sellers who schedule monthly reviews of their deeper listing strategies compound their gains over time.
Pro Tip: Set a recurring calendar reminder every 6 to 8 weeks labeled “listing audit” for your top 5 ASINs. This one habit will do more for your conversion rate than any single optimization tactic.
Ready to boost your conversions with expert support?
Applying this checklist consistently is powerful, but doing it alongside proven frameworks and experienced support accelerates your results significantly.

At Searchoneers, we work with Amazon sellers to build optimized listings that convert. From enhanced titles and bullet points to backend keyword strategy and A+ Content, our process is grounded in data and tested across categories. Explore our Amazon listing enhancement guide for a practical next step, use our detailed optimization checklist to self-audit right now, or learn how we approach personalized listing optimization for sellers who want a hands-on partner in their growth.
Frequently asked questions
What is a conversion rate checklist for Amazon sellers?
It’s a systematic set of steps and best practices that help sellers review and optimize every aspect of their product listings to increase the percentage of visitors who buy. As confirmed by Amazon’s own guidance, every listing benefits from a structured, repeatable optimization process.
How often should I update my Amazon product listings for maximum conversion?
Test and refine at least monthly, or whenever there is a significant change in traffic, pricing, or competition. Amazon recommends ongoing iterative updates over one-time changes to listings.
Which metrics should I monitor to measure conversions on Amazon?
Track sessions, unit session percentage (your conversion rate), and revenue before and after listing changes to measure improvement. Sessions and order percentage are the key metrics available directly in Seller Central.
What’s the biggest mistake sellers make with conversion rate optimization?
Changing too many listing elements at once makes it impossible to know which edits helped or hurt. Isolated, controlled tests are the recognized best practice for identifying what actually works.
Can I use the same checklist for every product category?
The core process applies universally, but you should adapt the priorities and specific tactics based on your niche and product type. Process fundamentals are universal; the details depend on the specific product and category.
Recommended
- Listing Optimization Checklist for Amazon Sellers Success – Searchoneers
- Amazon listing checklist: optimize for sales and visibility – Searchoneers
- How to Optimize Amazon Listings: Complete Guide
- Listing Optimization Workflow for Amazon Sellers Success – Searchoneers
- Amazon Conversion-Optimierung: Strategien für mehr Umsatz

Comments
2 responses to “Conversion Rate Checklist for Amazon Sellers: Optimize Every Listing”
[…] more guidance, visit evaluating Amazon sales data, optimizing listings for conversion, and Amazon FBA inventory […]
[…] kitchen accessories. The more relevant your message, the higher your open and click rates. Your conversion rate checklist can guide you on what behaviors to trigger emails […]